If you want to install or reinstall Windows 7, Windows 8.1, Windows 10 or Windows 11, you can go to the software download website and create your own installation media using either a USB flash drive or a DVD.
Backing up files before proceeding
Backing up your files is very important, and the best way to prevent data loss.
Before you go to the download website, here's what you need:
A PC with a reliable internet connection The 4 GB download time varies, depending on your internet connection.
A USB flash drive or DVD A blank USB flash drive or DVD with at least 5 GB of available drive space. Using a DVD requires a DVD burner and software on the PC you’re using to create the media, as well as a DVD player on the PC where you want to install Windows.
You'll find further requirements and step by step instructions on the software download website. Select the link that matches your version of Windows. On that page, under Create Windows installation media, click the button for Download tool now.
Using the tool to create installation media
-
Click Download tool now to download the MediaCreationToolXXXX.exe
(If you are asked for a download location, do not download it to the USB drive you intend to use later as your bootable drive.)
-
After the download is complete, locate the file on your computer where you downloaded it and double-click the file MediaCreationToolXXXX.exe to run the application. You need to be an administrator to run this tool.
(XXXX is a reference current version number so it may vary)
-
You may get a popup that asks you to allow the application to make changes to your computer (Figure 1). Click Yes to proceed.
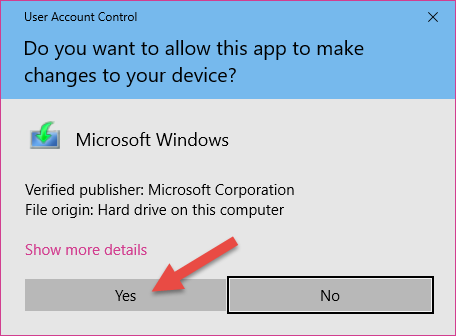
Figure 1: Launch Media Creation Tool
-
If you agree to the license terms, select Accept.
-
On the What do you want to do? page, select Create installation media for another PC, and then select Next.
-
Select the language, edition (choose Windows 10/11), and architecture (choose 64-bit) for Windows 10/11.
- Select which media you want to use:
-
USB flash drive (recommended). Attach a blank USB flash drive with at least 8GB of space. Any content on the flash drive will be deleted.
-
ISO file. Save an ISO file to your PC, which you can use to create a DVD. After the file is downloaded, you can go to the location where the file is saved, or select Open DVD burner, and follow the instructions to burn the file to a DVD.
-
-
After the installation media is created, follow the steps below to use it.
- After completing the steps to install Windows 10/11, please check that you have all the necessary device drivers installed. To check for updates now, select the Start button, and then go to Settings > Update & Security > Windows Update, and select Check for updates. You may also wish to visit your device manufacturer’s support site for any additional drivers that may be needed.
Using the installation media you created
-
Attach the USB flash drive or insert the DVD on the PC where you want to install Windows 11.
-
Restart your PC.
-
When pressing your computer's Power button and watch for the CyberPower logo or Motherboard manufacturer's logo (MSI, Gigabyte, ASUS, ASRock) to appear.
-
When the logo appears, press the following F (function) key several times based on your motherboard brand to load the Boot menu.
- MSI, ASRock or CyberPowerPC Motherboards: F11
- Gigabyte and NZXT: F12
- ASUS: F8
-
If this menu does not appear, try restarting your computer again and repeat the above step
-
Once the Boot menu opens, select the optical or USB drive with the Windows installation media and press Enter.
- If using UEFI be sure to select the correct boot option (example: UEFI-USB storage device)
-
When Windows 11 Setup appears, confirm that the Language, Time and currency format fields display the correct settings then click "Next"
-
Select Install Windows 11 (Figure 2) from the Select setup option window and make sure to tick the box for "I agree everything will be deleted including files, apps and settings." and then click "Next"
Figure 2: Select Install Windows 11
-
On the next page, you'll be prompted to enter a product key.
IF you purchased your PC with Windows and you have the original motherboard you can skip this step by clicking "I don't have a product key"
IF you have your own product key that you wish to use, you can enter it here and then click "Next"
Figure 3: Product Key
-
Follow the installation prompts and accept the terms and conditions until you reach the "Select location to install Windows 11" section of the installation.
-
Select each Drive 0 Partition and click Delete to delete the partition. Ensure that you've deleted all versions of Drive 0. (Figure 4) If you don't have any Drive 0, you may only have Drive 1, then you can delete all versions of Drive 1 instead.
Figure 4: Deleting Partitions
-
Once completed you should see a single Drive 0 Un-allocated Space (Figure 5)
Figure 5: Unallocated Space
-
Selected Drive 0 Unallocated Space and click Next to begin the installation
- Follow the rest of the installation process to complete Windows Install.
Comments
1 comment
Thank you for instructing me in how to un-crash our family computer.
Regards,
Victor Botran-King
Please sign in to leave a comment.